
How to add upvotes and favorites to Webflow
Now that you have signed up to Supersparks, authorized your site, and navigated to the editor screen for our upvoting & favoriting product, you can get started with the installation.
1. Copy & Paste Component
The beauty of this product is that it can be used for a wide-range of use cases. For example, upvoting, favorites, bookmarks, mark as watched, following topics, etc. As a result, there are a wide-range of use-case specific components to choose from that can be added to any CMS collection page.

After selecting, click on the copy button and paste it (using cmd + v or ctrl + v) into the static or CMS collection template page you would like to allow users to upvote / favorite. ⚠️ Please note, pasting components will not work on Safari ⚠️.


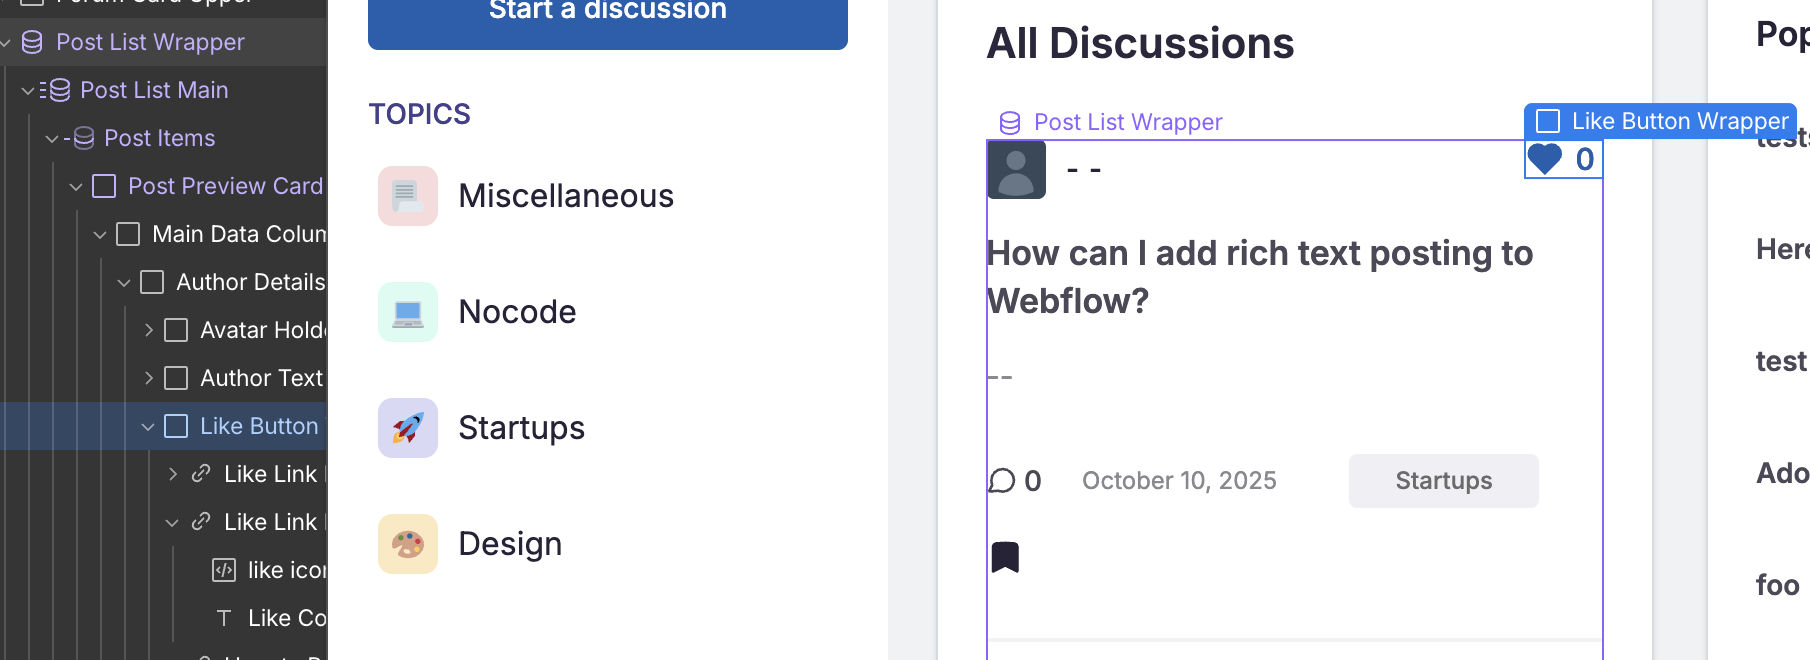
You can also add the same component to your collection list element:
2. Paste Code Snippet
The second step is to copy and paste the Supersparks' script and paste it inside the <head> tag of your site settings. If you have previously added our script for another spark, you will not need to do this step again - your site only needs one copy of our script.
3. Configure settings
The next step in Supersparks, is to select the collection users are upvoting / favoriting. Once that is done, you can also select a number field in the collection if you wanted the number of upvotes / favorites to be synced into CMS item data - this unlocks the ability for users to sort items in a collection list by popularity / upvotes. Lastly, you can then select the membership tool you are using on your site - currently, only users of your site logged in through Memberstack, Outseta, or Webflow Memberships will be able to use this functionality.

OPTIONAL: Collection Lists Upvoting
If you would like to allow users to upvote from a collection list, add the attribute to supersparks-upvotes-list = true to the collection list like in the below example:
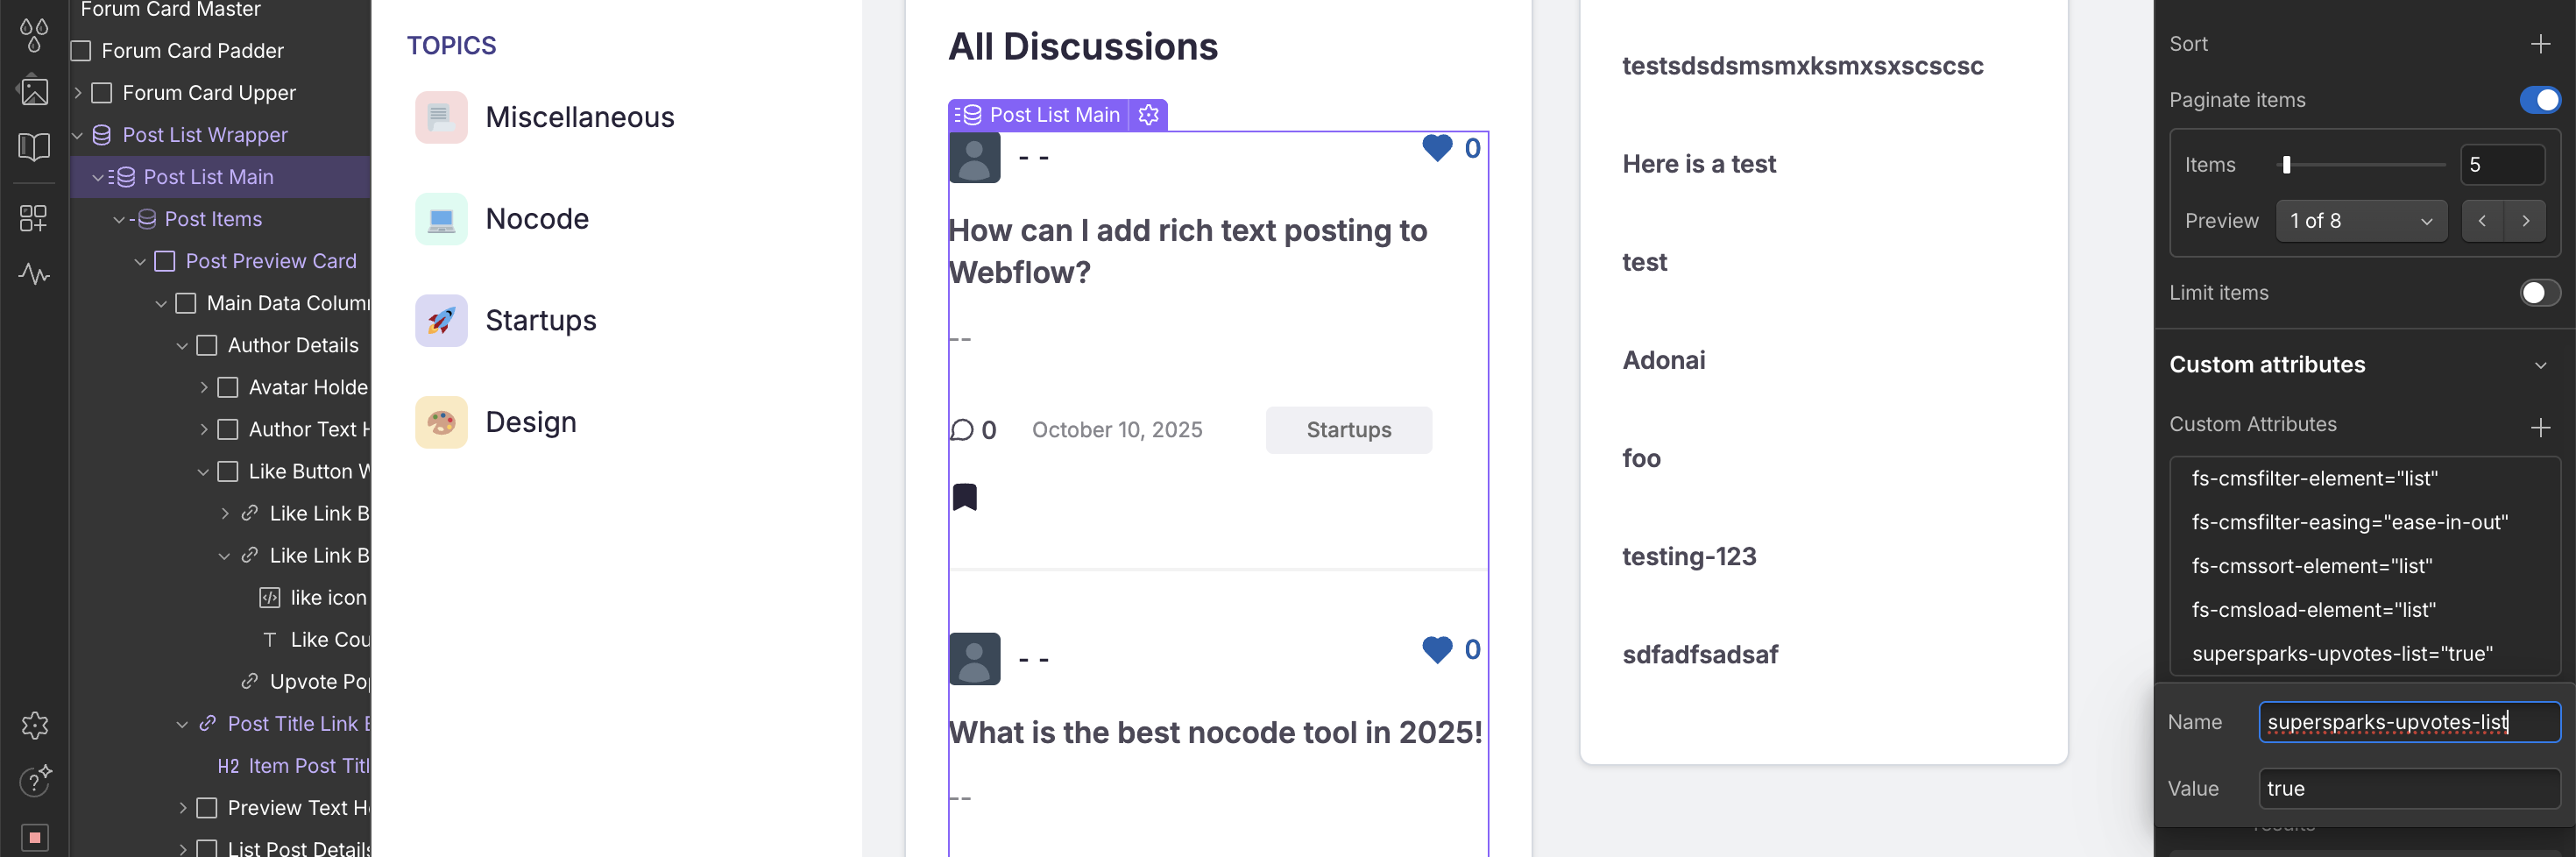
And make sure, to add another attribute with name 'slug' and connect the value to the 'Slug' CMS field of the collection:

4. Adapt design
Now the fun begins! In the Webflow Designer you can adapt the design of every aspect of the upvote / favorite component in the Webflow designer. Please note, classes or attributes starting with 'supersparks' or 'sparks' are required for the Supersparks app to function, so please avoid renaming or removing them.
5. Publish And Test
Publish your Webflow site and you can begin adding test reviews on your live site!
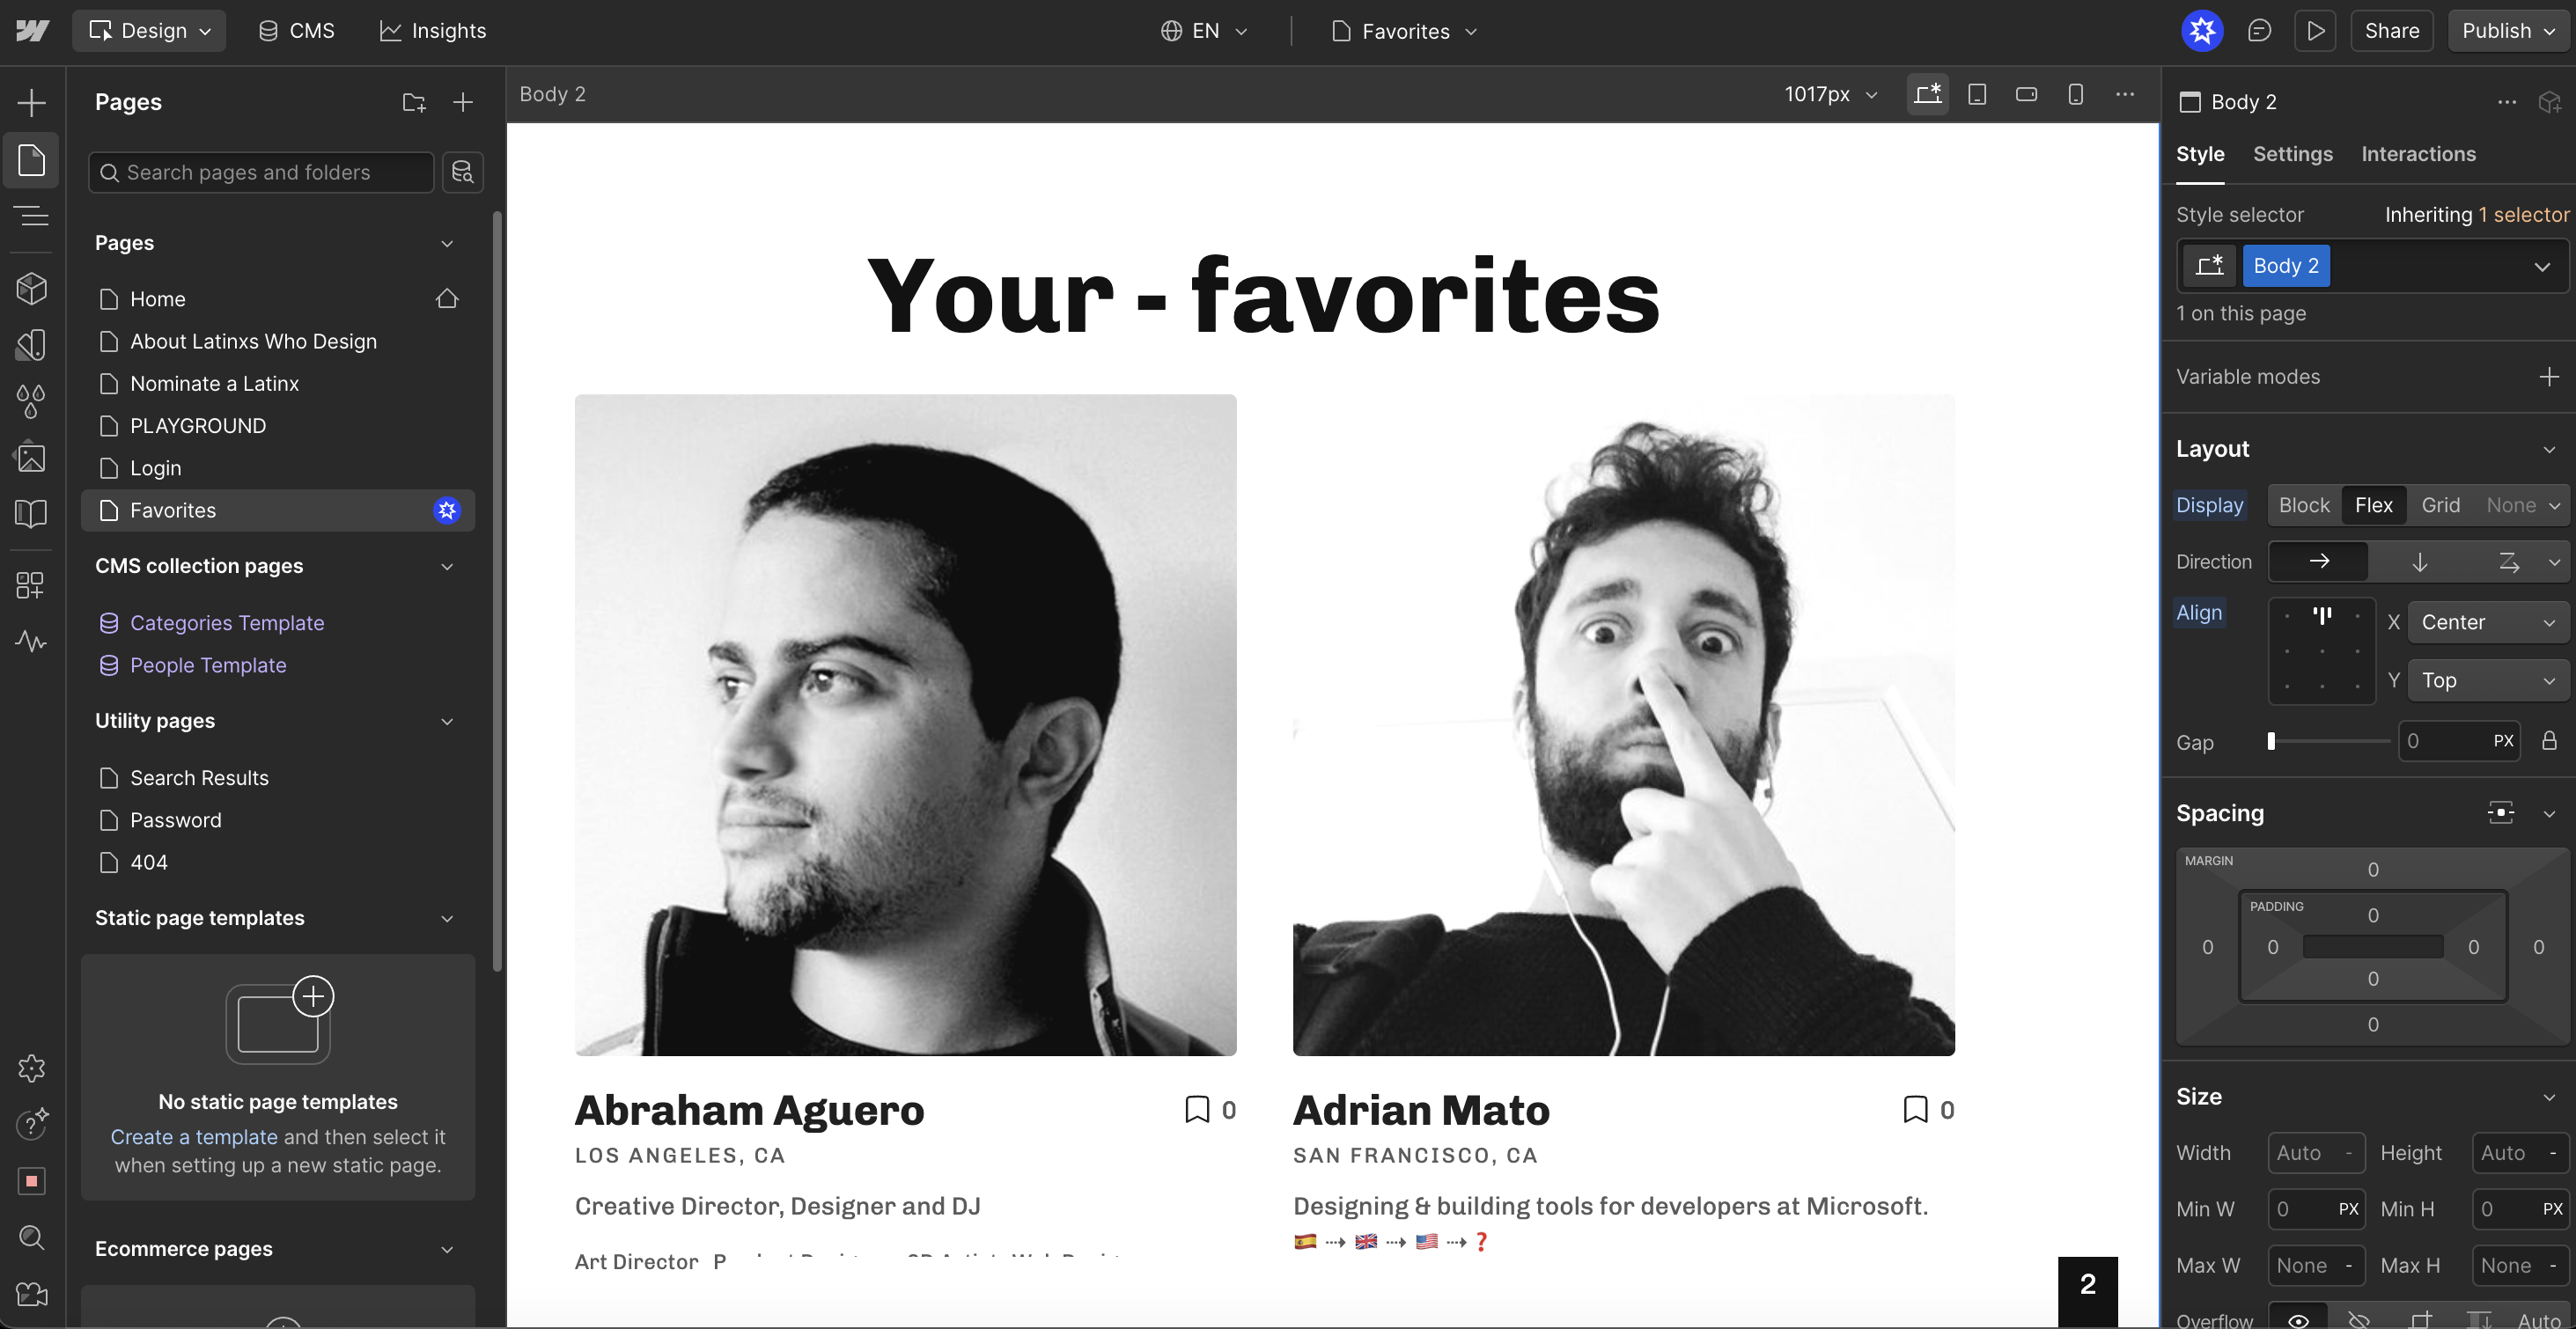
OPTIONAL: Webflow CMS Favoriting / Bookmarks
To use this app for favoriting or bookmarking, you just need to first copy and paste collection list where users are adding their favorites to a separate area of your site - a common place would be a separate static page where users can see all their favorites.
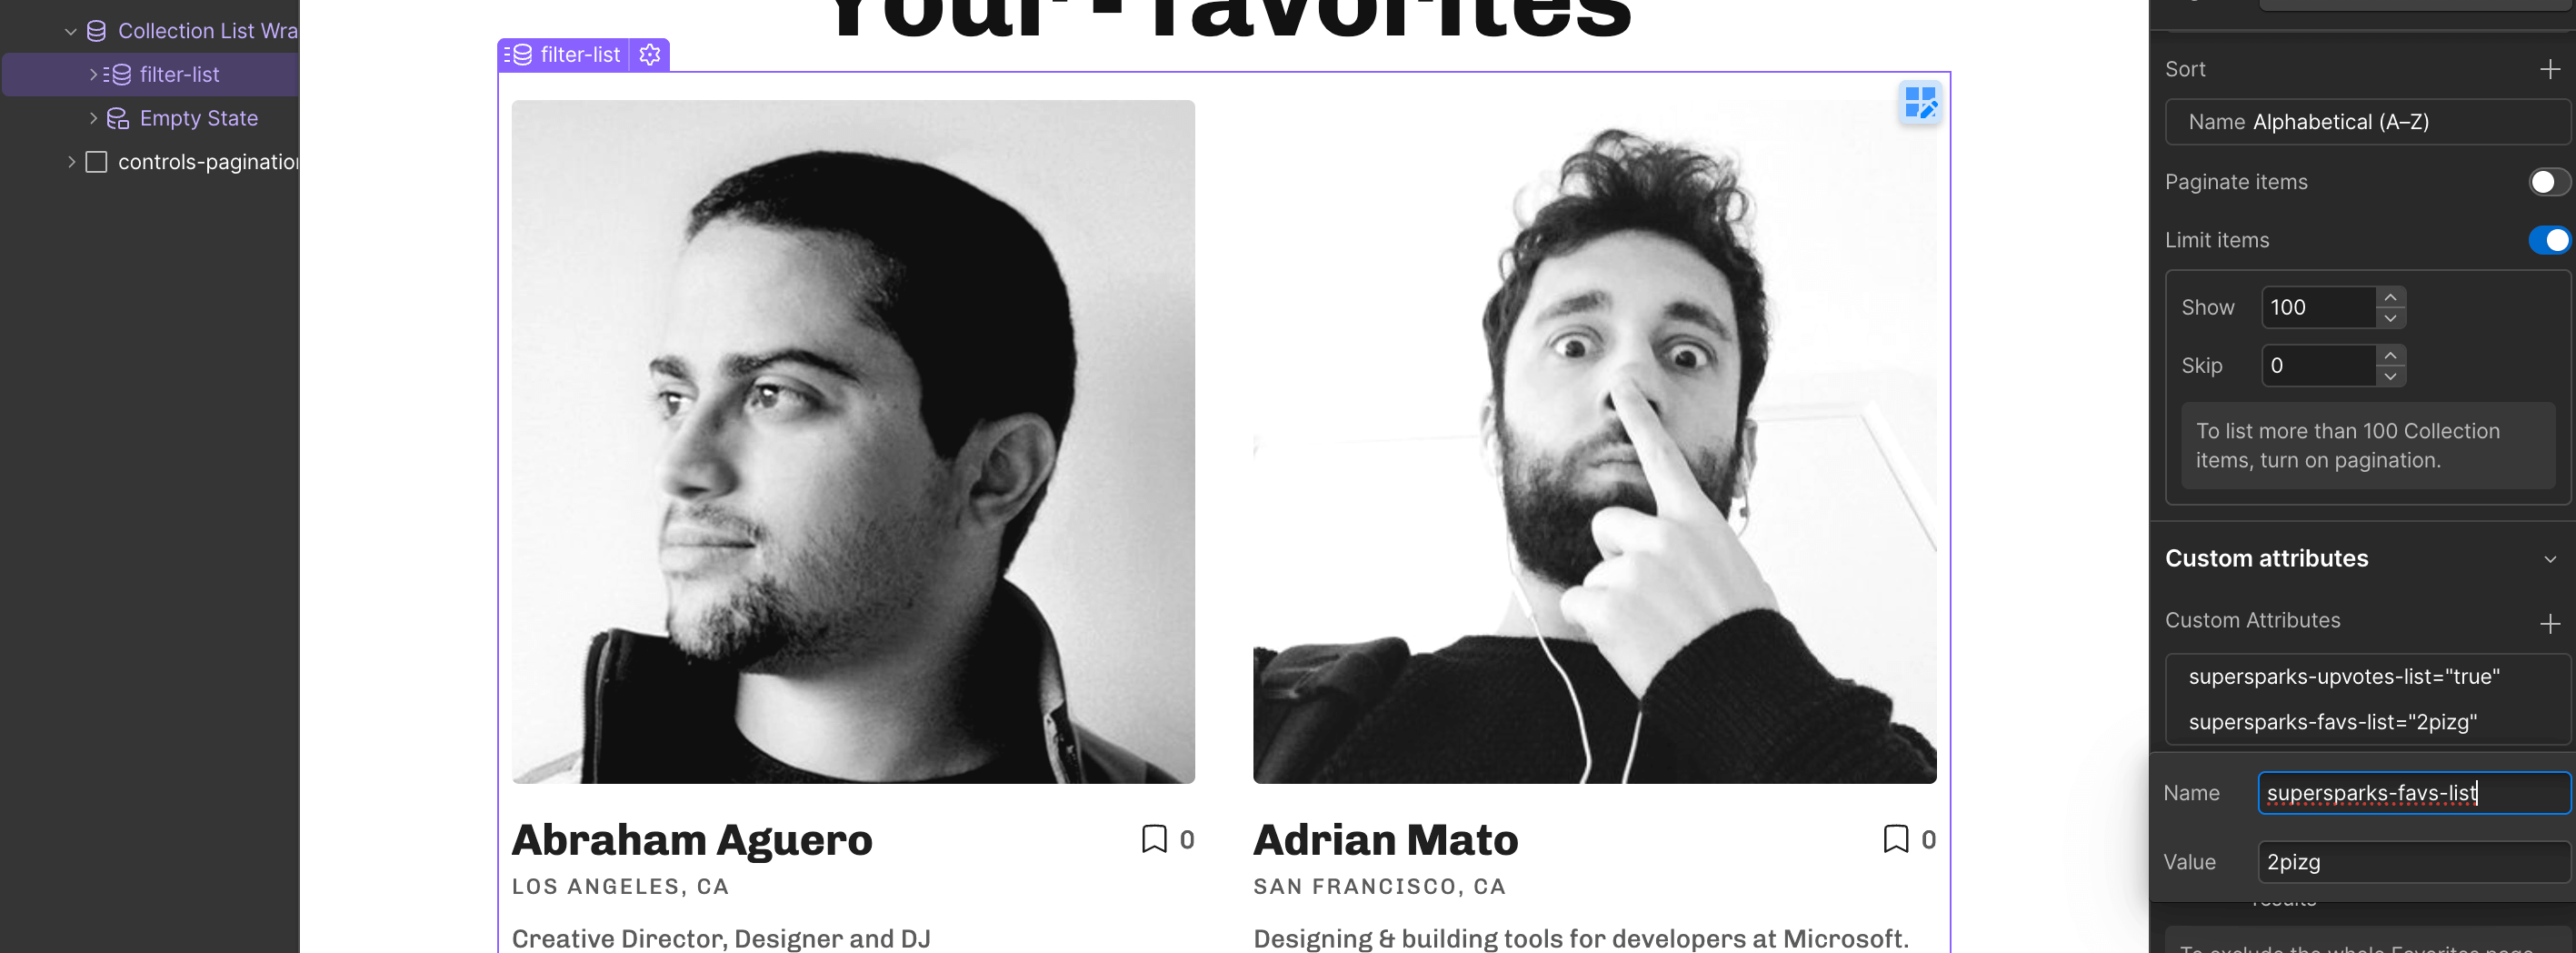
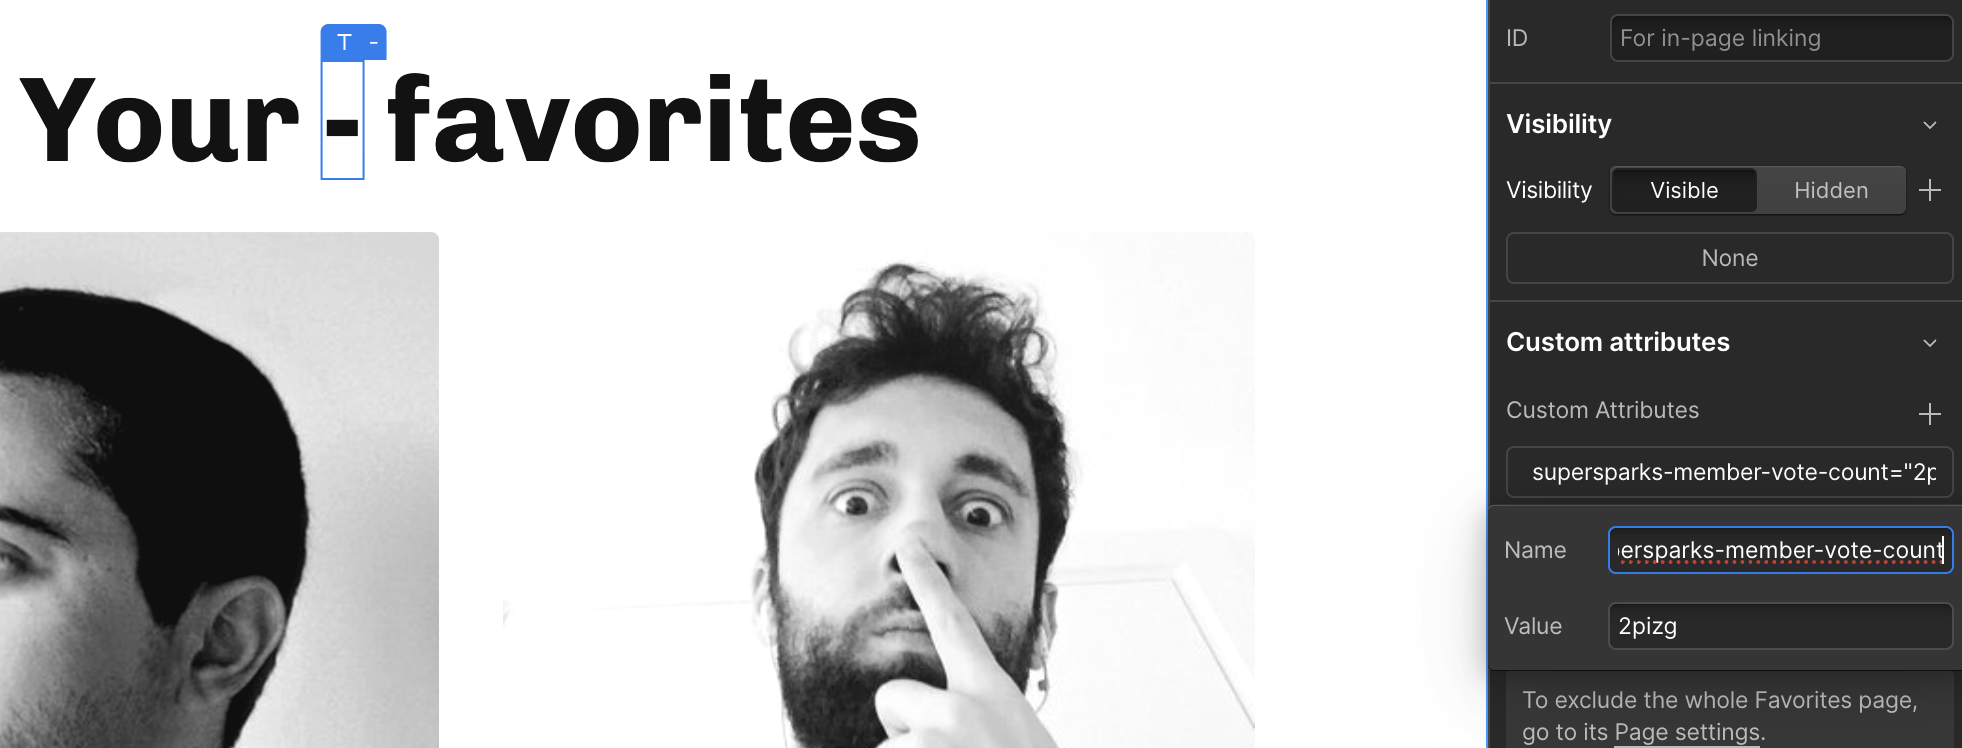
Once pasted, select the 'Favoriting' extra feature of the Supersparks extra features for your favoriting spark, and then copy & paste the attribute to the collection list you just duplicated.

To show a total count of upvotes, add the second optional attribute to a text element for total count
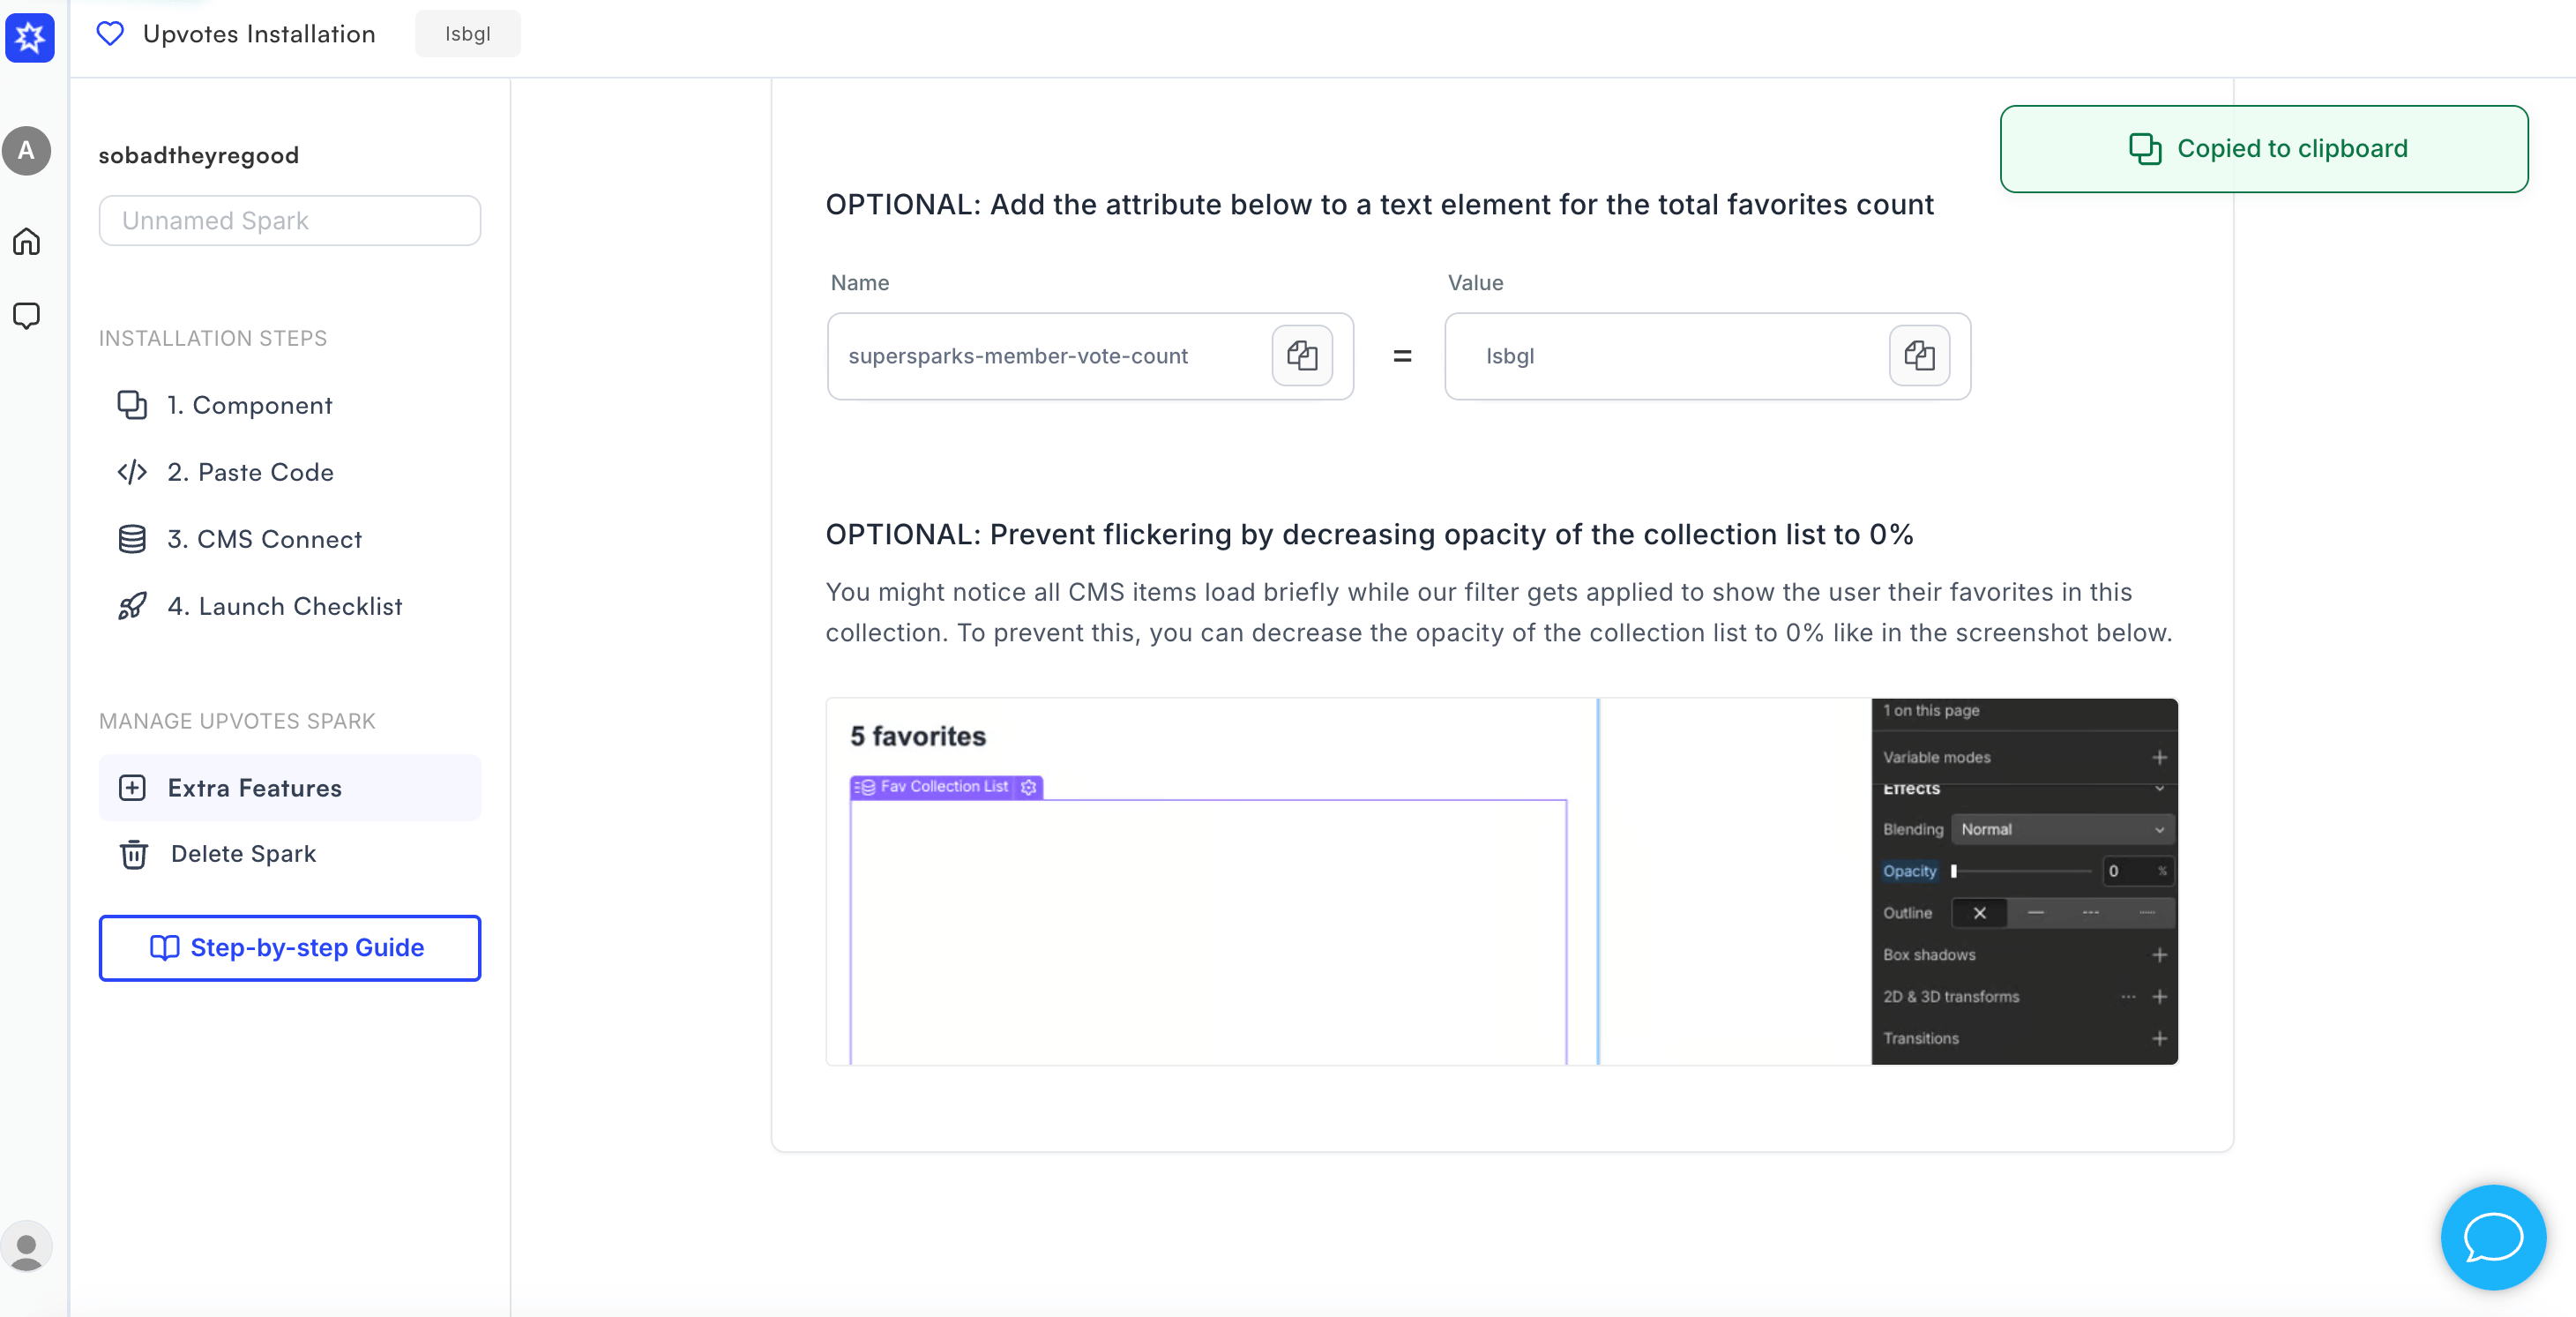
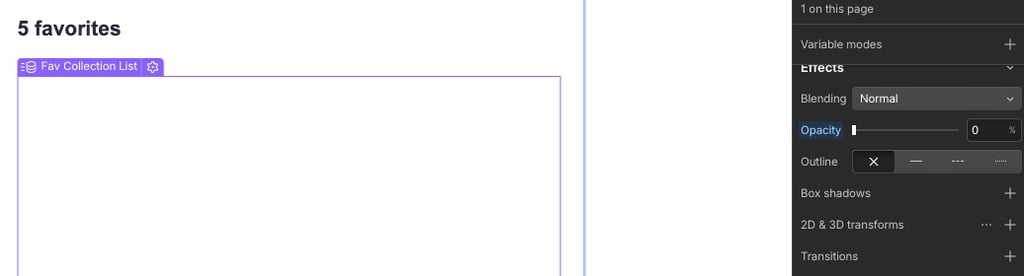
To prevent flickering of non-favorited items, you can also decrease the opacity of the collection list to 0% - just make sure it has a different class so the opacity decrease is only in the favorites list.
Video Tutorial
Please note, this tutorial is focused on the favoriting use case. But you can still follow along if you are only using this app to enable upvoting or liking - just ignore any parts about favoriting.


